IGA Guide: Setting Up and Using Tide IGA
This guide walks you through setting up and using Tide's Identity Governance & Administration (IGA) system. Focus areas include protecting JWT signing keys, managing user roles, and controlling client settings through a multi-admin approval workflow.
Prerequisites
Before you begin, ensure you have:
- An admin account in your IGA-enabled realm.
- A Tide IDP-backed realm with license activated.
- Familiarity with access tokens, roles, and client scopes.
- Access to the Tide admin console.
- The latest TideCloak version installed.
Process Overview
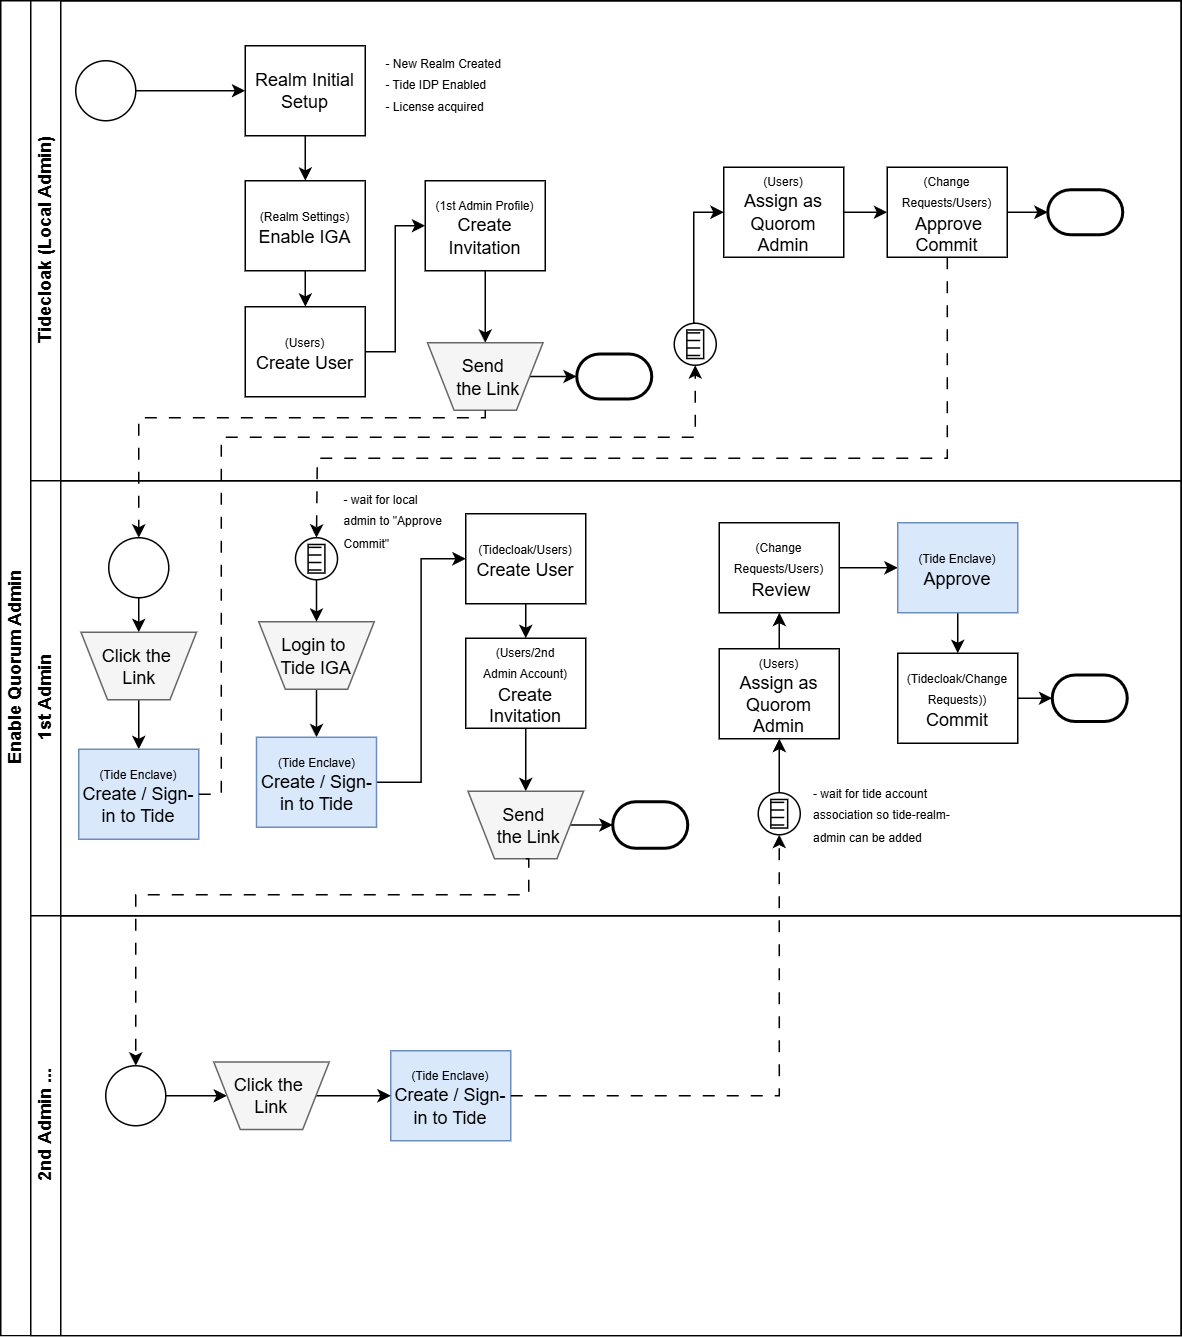
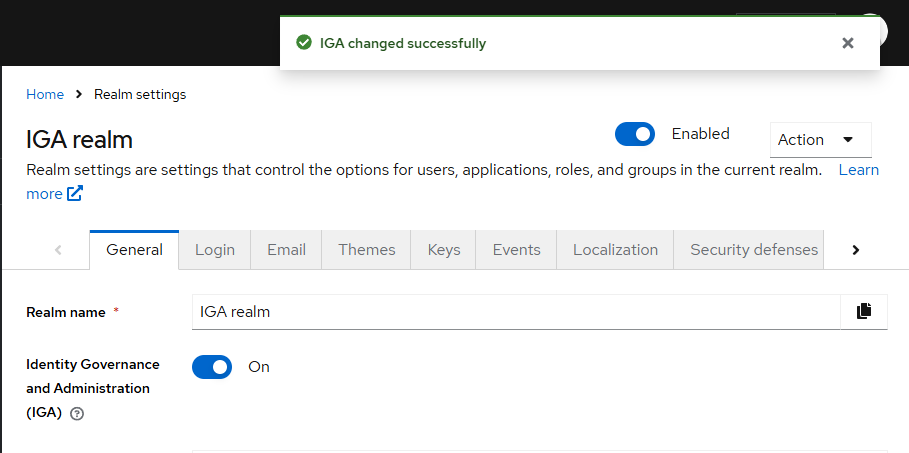
1. Enable IGA
- Go to Realm Settings → Identity Governance and Administration.
- Toggle Enable IGA on.
2. Create the First IGA Admin
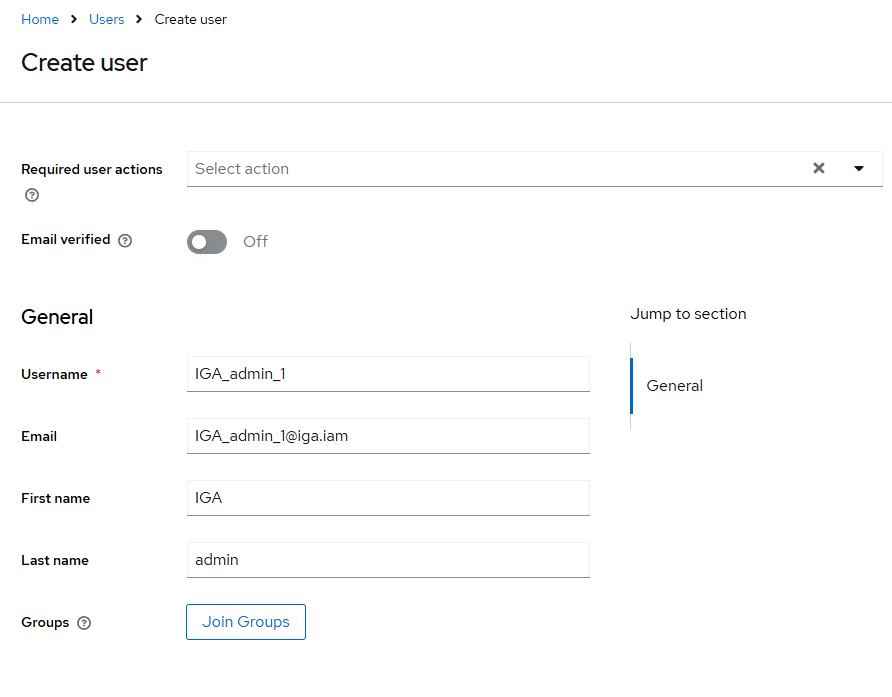
2.1 Add a User
- In the left menu, select Users → Add user.
- Fill in the username (e.g.
iga_admin_1) and click Save.
2.2 Link Tide Account
- Click the new user → Credentials tab → Credential Reset.
- Under Reset action, choose Link Tide Account.
- Click Copy Link and open it in your browser.
- Sign in or sign up for your Tide account.

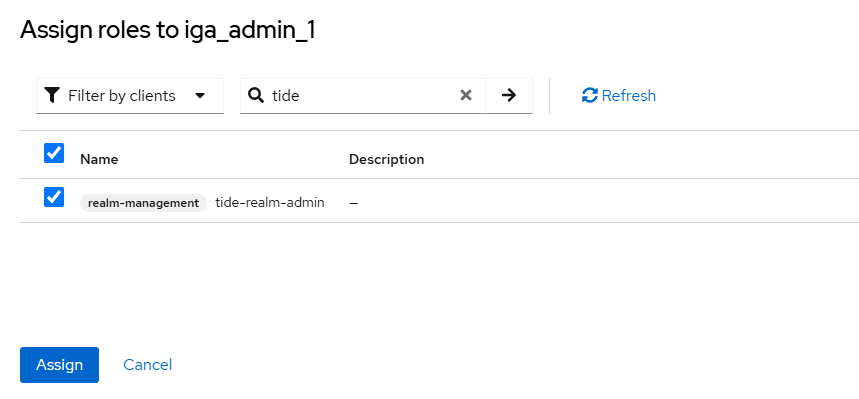
2.3 Assign Realm Admin Role
- Select the user → Role Mapping tab → Assign role.
- Add the tide-admin-role.
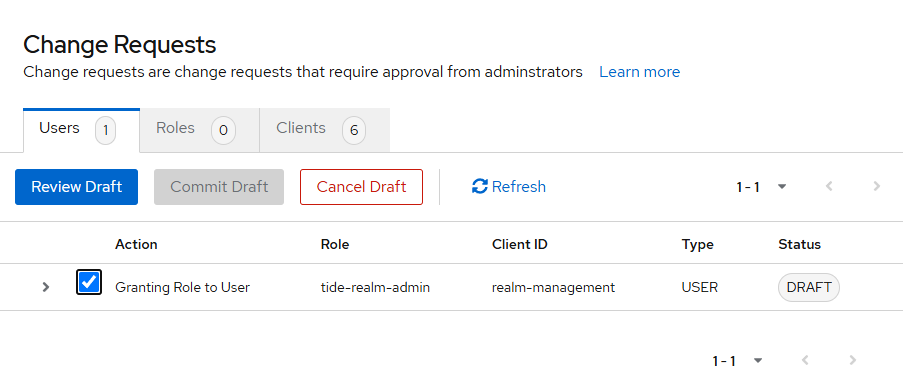
2.4 Approve Role Assignment
- Go to Change Request in the left menu.
- Under Grant Role to User, click Review Draft.
- Confirm the box and then Commit Draft.
3. Add Additional Admins
Repeat steps 2.1-2.4 for each new admin.
- After 2 admins, any change requires 2 of 2 approvals.
- Adding a 3rd admin raises the threshold to 2 of 3 (70% of total admins).
Example threshold formula:
``` RequiredAdmins = ceil(TotalAdmins × 0.7) ```
4. Accessing Change Requests
- Log in to the TideCloak Admin Console (https://
<your-domain>/admin/<realm>/console/). - From the left menu, select Change Request.
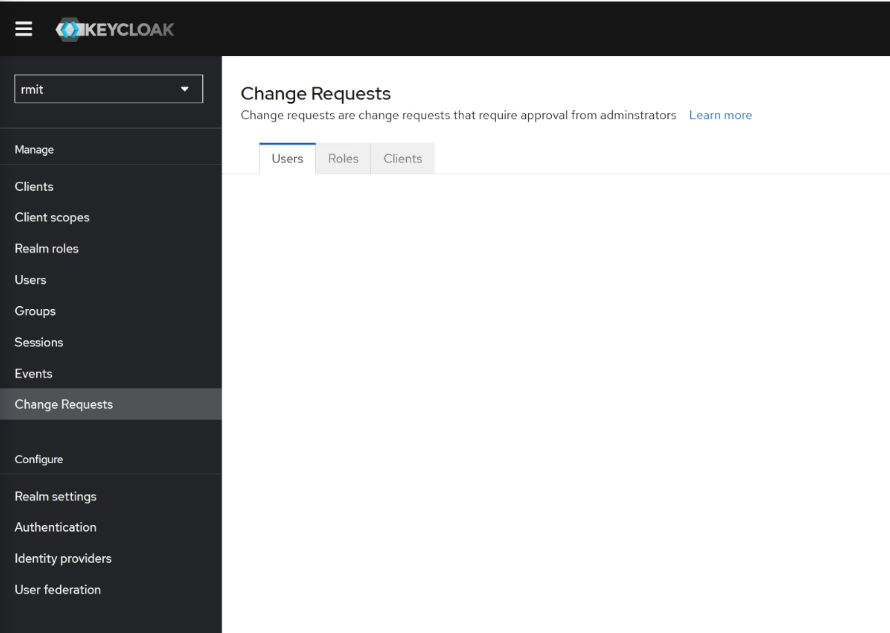
4.1 Tabs Overview
- Users: Role assignment/removal requests.
- Roles: Role creation/modification requests.
- Clients: Client scope and setting requests.
5. Managing Change Requests
5.1 Approving Drafts
- Under Change Request, select the Draft entry.
- Click Approve Draft, then Commit Draft.
5.2 User Role Changes
- Assign or remove roles via Users → Role Mapping → Assign/Unassign.
- A draft appears in Change Request → Users.
- Approve and commit to finalize.

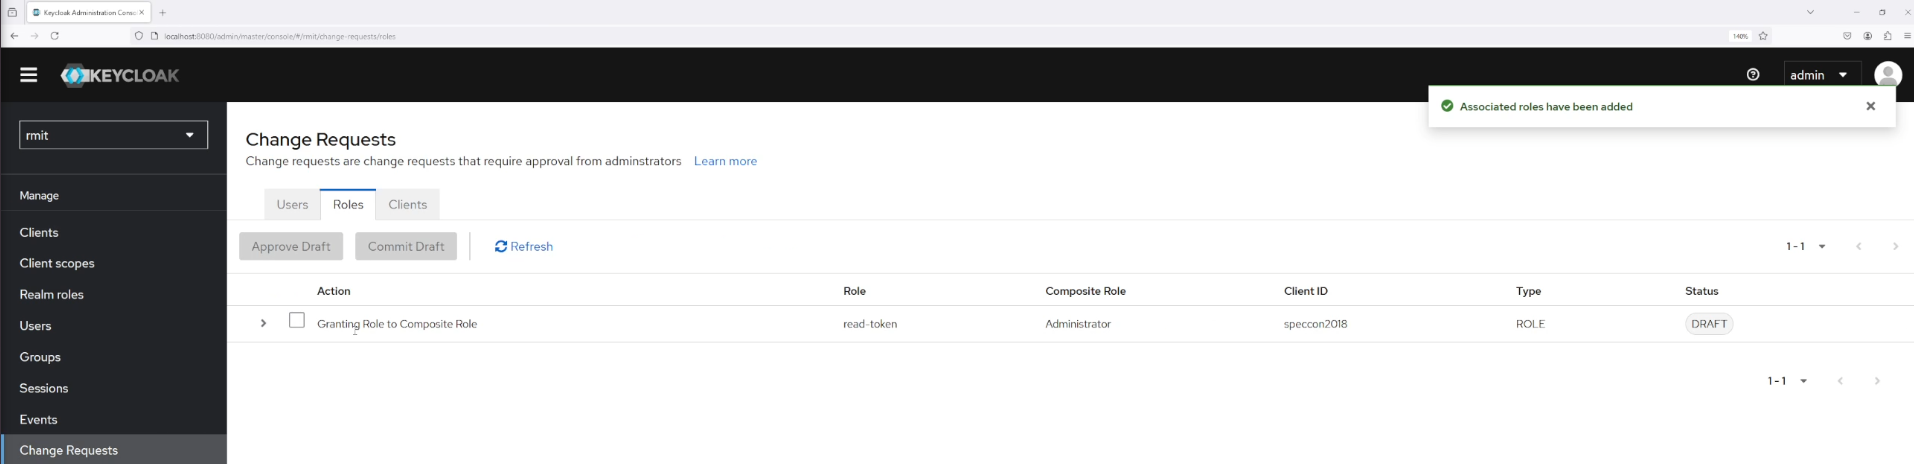
5.3 Role Management
- Manage roles under Clients → Roles tab.
- Create or modify roles; user-impacting changes generate drafts.
- Approve via Change Request → Roles.
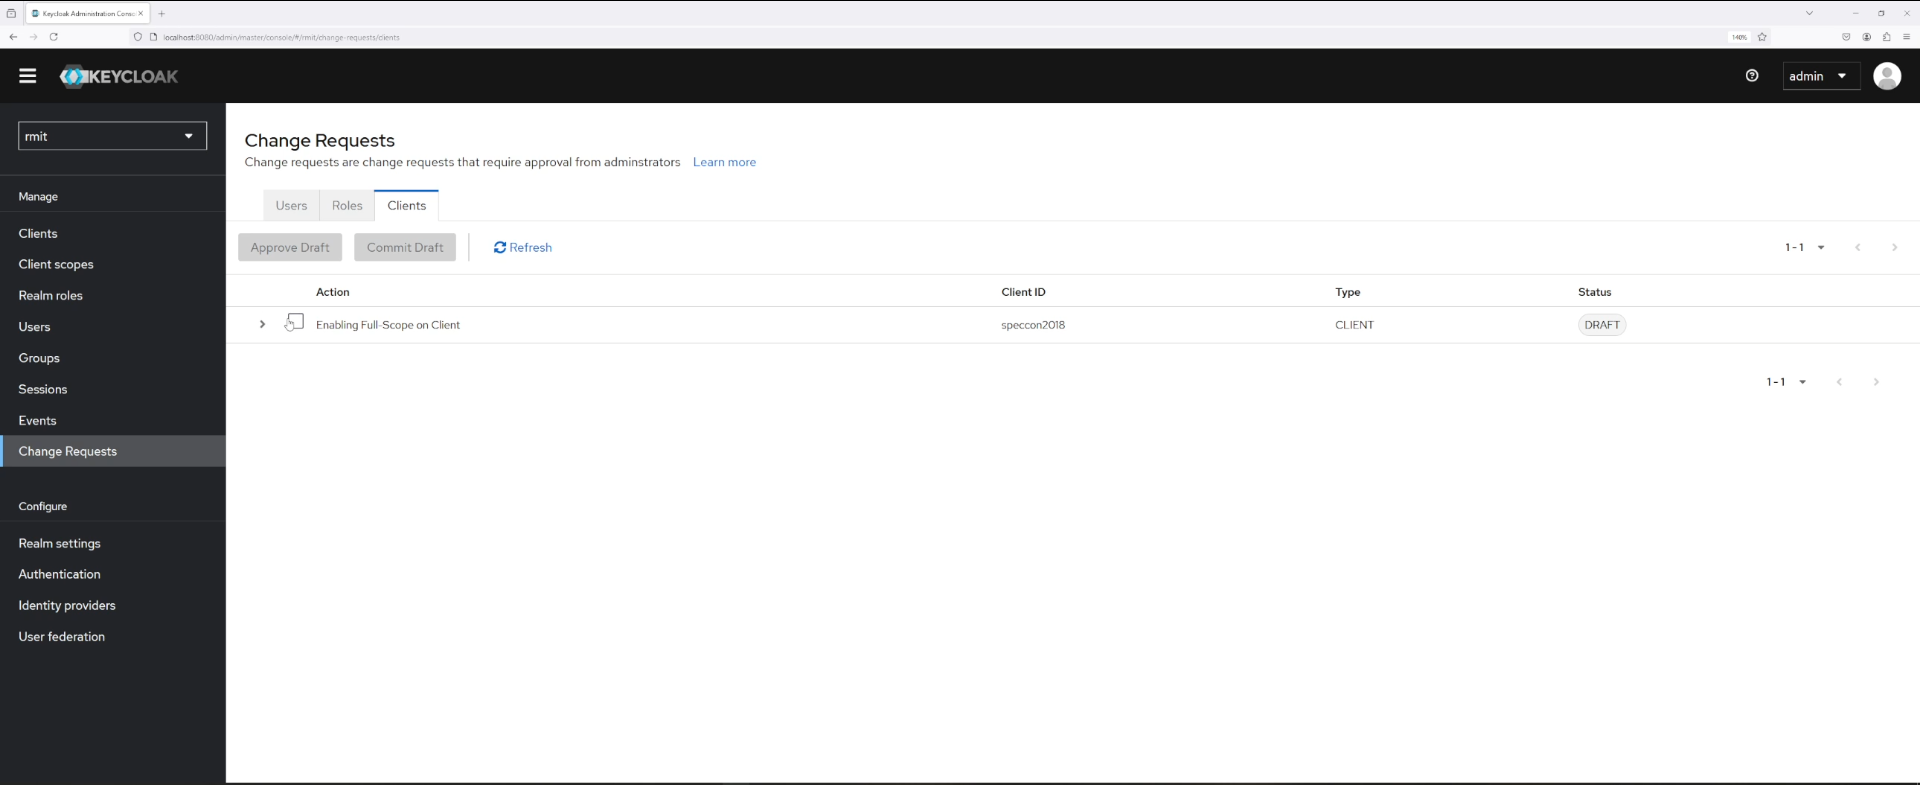
5.4 Client Scope Changes
- Modify scopes under Clients → Client Scopes.
- Changes affecting permissions generate drafts in Change Request → Clients.
- Approve and commit to apply.
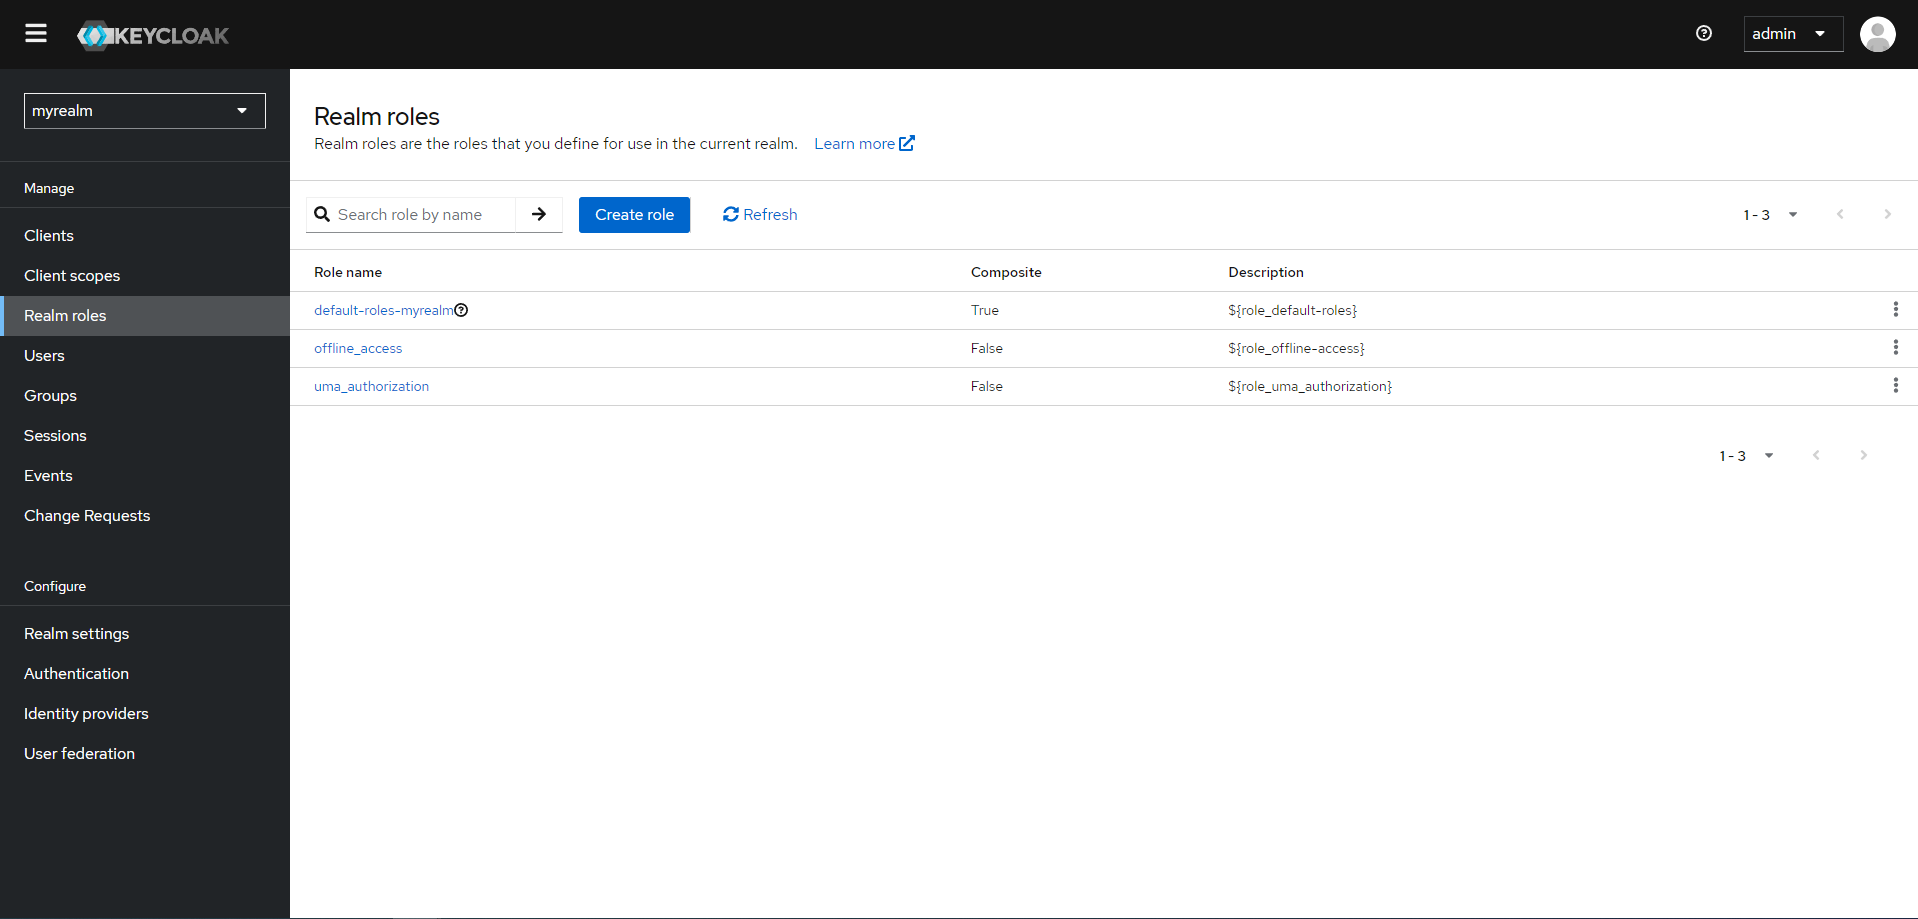
6. Default Roles Management
Parent roles (e.g., default-roles-myrealm) group child roles and auto-assign them to new users.
- Go to Realm Roles → default-roles-myrealm.
- Add or remove child roles.
- Changes require the same IGA approval process.
7. Action Types in Change Requests
| Action | Type | Trigger |
|---|---|---|
| Granting Role to User | User | Assign role in Role Mapping |
| Unassigning Role from User | User | Remove role in Role Mapping |
| Granting Role to Composite Role | Role | Add child role under Roles |
| Enabling Full Scope | Client | Toggle Client Scopes → Full Scope |
Congrats! You've set up Tide IGA and learned how to manage governance over users, roles, and clients with multi-admin approval.