lGA Guide: Setting Up and Using Tide IGA
This guide will walk you through setting up and using the Identity Governance Administration (IGA) system in Tide, focusing on managing access token-related changes, user roles, and client settings.
Prerequisites
Before starting, ensure that you have:
- Access to an admin account in Tide IGA.
- Basic understanding of access tokens, roles, and client scopes.
- Familiarity with the Tide admin console.
- The latest version of TideCloak installed.
- New realm created with Tide IDP added and Tide license activated.
Process Overview
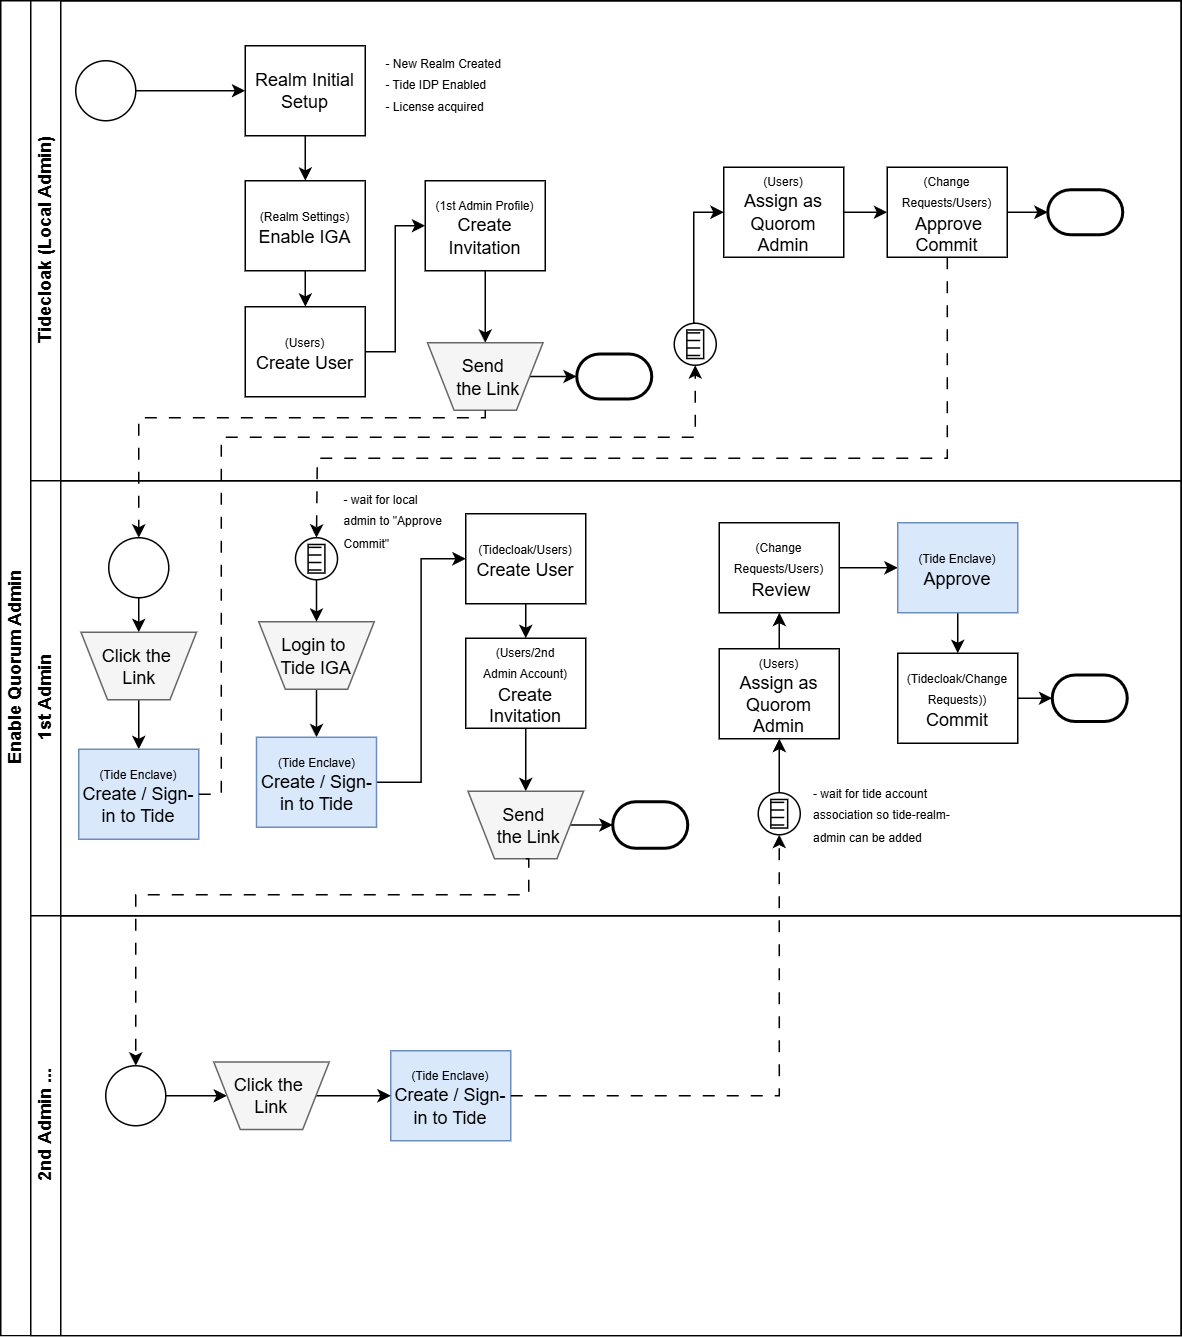
1. Setting up the IGA
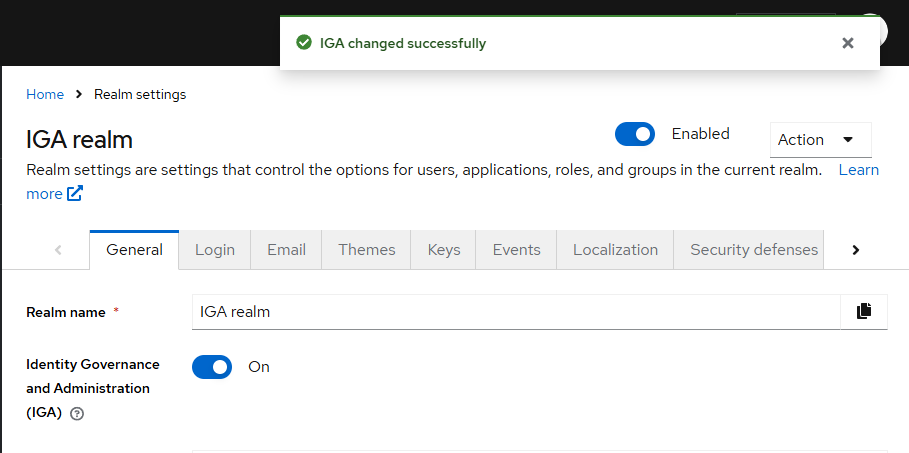
1.1 Enable IGA
-
Under Realm Settings enable Identity Governance and Administration toggle.
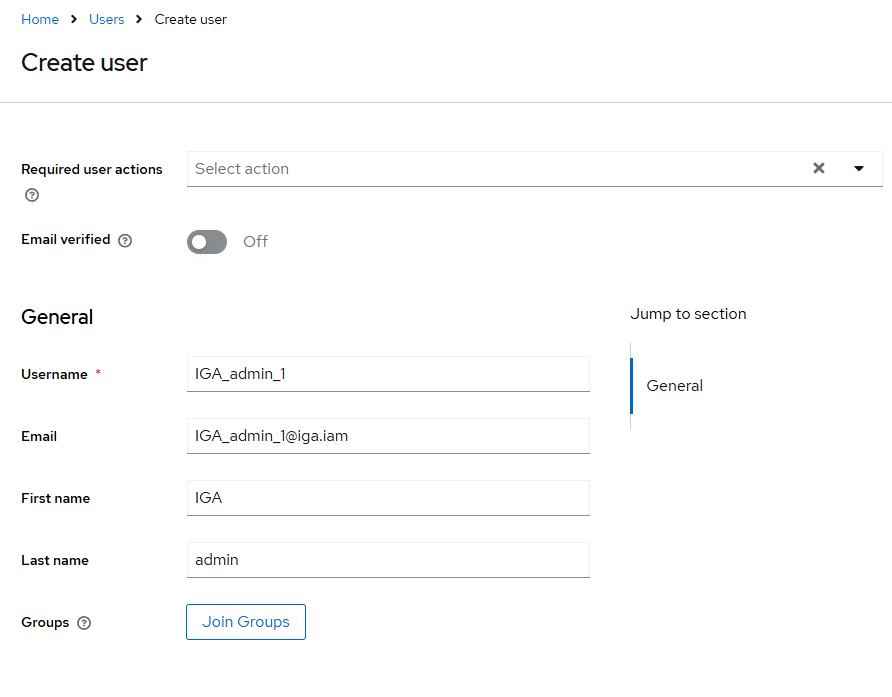
1.2 Creating the first Admin
-
Click Users from the left menu then click the Add user button
1.3 Associating Tide Account
- Click on the newly created user "iga_admin_1"
- Under the Credentials Tab, click on Credential Reset
- On the Reset action drop down, select Link Tide Account

- Click on Copy Link button
- Paste the link on address bar of a browser. This will open a Link Tide account Action and click to proceed.
- Sign-in your Tide Account if it exist or Sign-up for a new one.
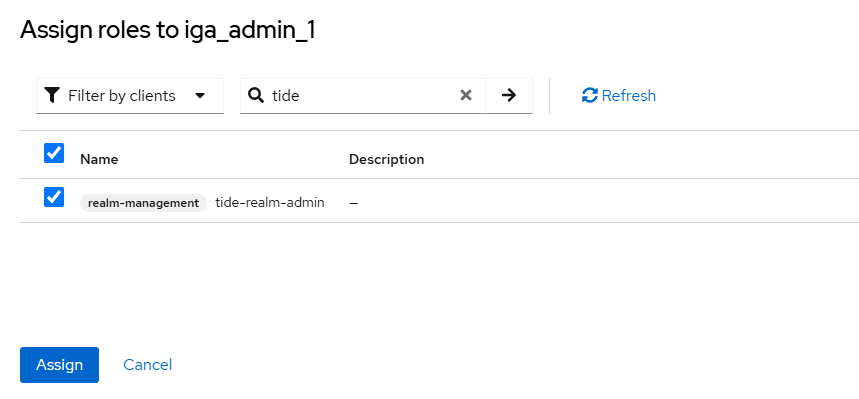
1.4 Assigning the Tide Realm admin Role
-
Click the newly created user
-
Under the Role Mapping tab, click on Assign role button
-
Add the tide-admin-role to the user
1.5 Approving the Role
- Click on Change Request from the Left menu.
- Click on Grant Role to User tick box
- Click on Review Draft button
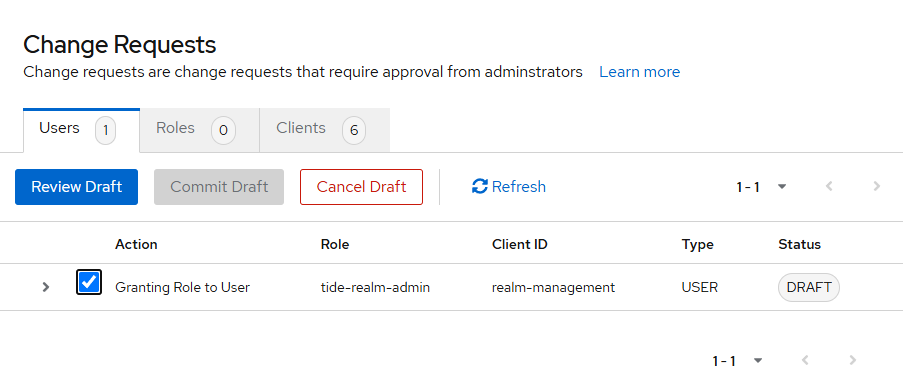
- Click on Grant Role to User tick box
- Click on Commit Draft
1.6 Adding the next Admin
-
Login to the newly created admin account. Use the following URL https://yourdomain/admin/IGArealm/console/ where yourdomain is where your tidecloak is hosted.
-
Click Users from the left menu then click the Add user button
-
Follow the Associating Tide Account instructions
-
Once the account for IGA2 admin has been associated, IGA admin 1 can add the Tide Realm admin role. Follow the Assigning the Tide Realm admin Role
-
Click on Change Request from the Left menu.
-
Click on Grant Role to User tick box
-
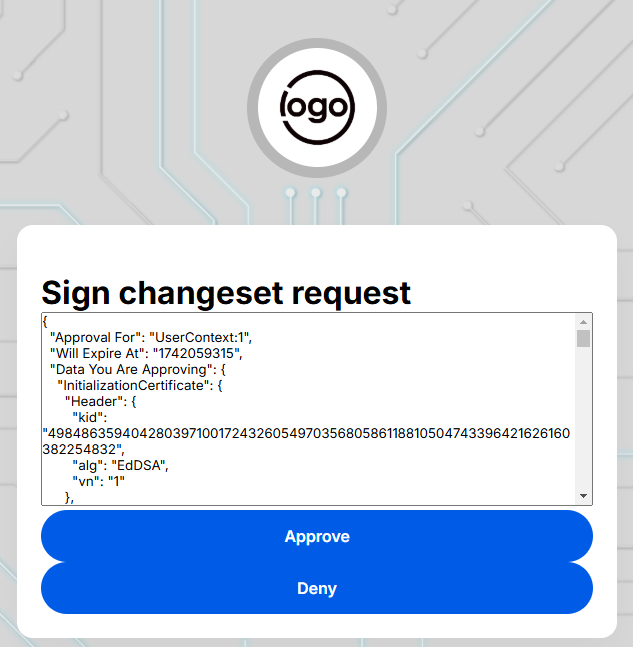
Click on Review Draft button- a Tide enclave will pop-up. Sign-in with the first Admin account details.
-
Sign the changeset request but clicking the Approve button
-
Click on Grant Role to User tick box
-
Click on Commit Draft. The realm will now have 2 admins.
1.7 Threshold
Adding the 3rd admin will now need an approval from 2 out of 3 admins for any changes to the realm. Here's how the threshold is calculated with the IGA:
TotalAdmin = Total number of admins 70% = Threshold percentage RequiredAdmin = Number of Required admin to approve a request
RequiredAdmin = int(TotalAdmin * 70%)
examples: 4 admins int(4 * 70%) = 2 admins needed for approval
3 admins int(2* 70%) = 2 admins
6 admins int(6 * 70%) = 4 admins
2. Access Change request
To access the IGA section in the TideCloak admin console, first log in using your admin credentials. Select the appropriate realm from the dropdown menu in the upper left corner. From the left-hand navigation menu, scroll down and click on the Change Request tab. This is where all change requests related to Users , Roles , and Clients are tracked. Here, you can view and manage pending requests, including approvals.
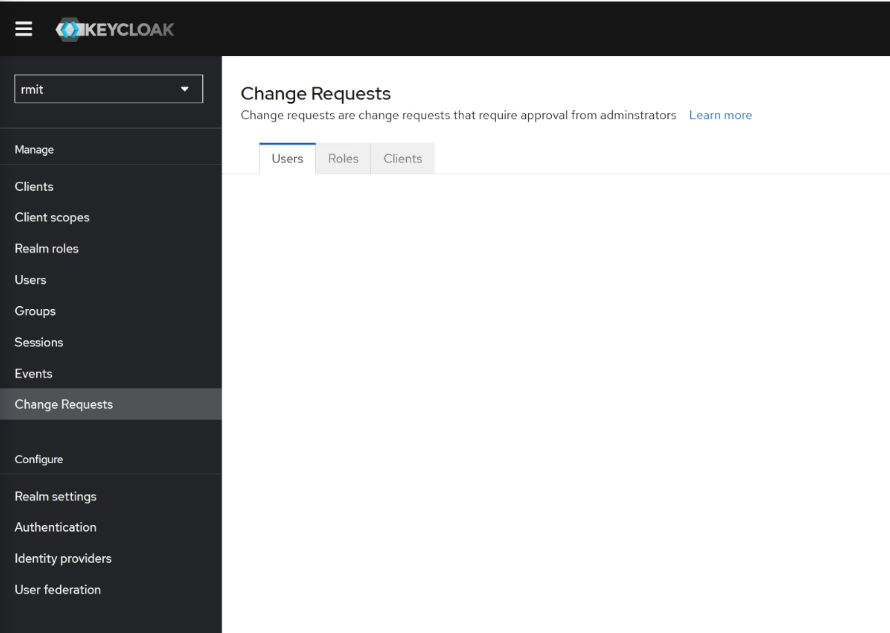
2.1 Understanding the Change Request Tabs
Once inside the Change Request section, you will notice three sub-tabs, each focusing on different types of change requests:
- Users : This tab displays change requests related to user role assignments, removals, or modifications. Any changes affecting individual users, such as adding or removing roles, will appear here. You can also track the approval status of these requests.
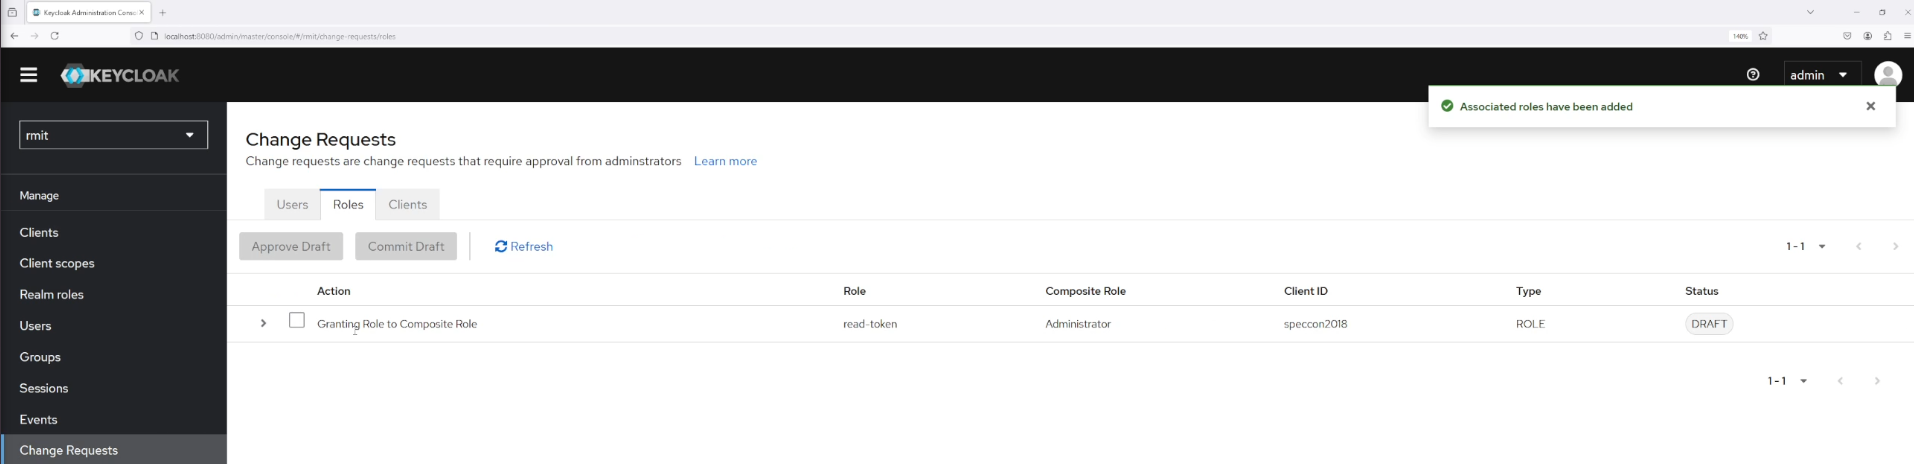
- Roles : This tab contains change requests related to role management. These include adding or modifying child roles, updating parent roles, or adjusting role hierarchies. Any role changes that may impact users will require approval and will be listed here.
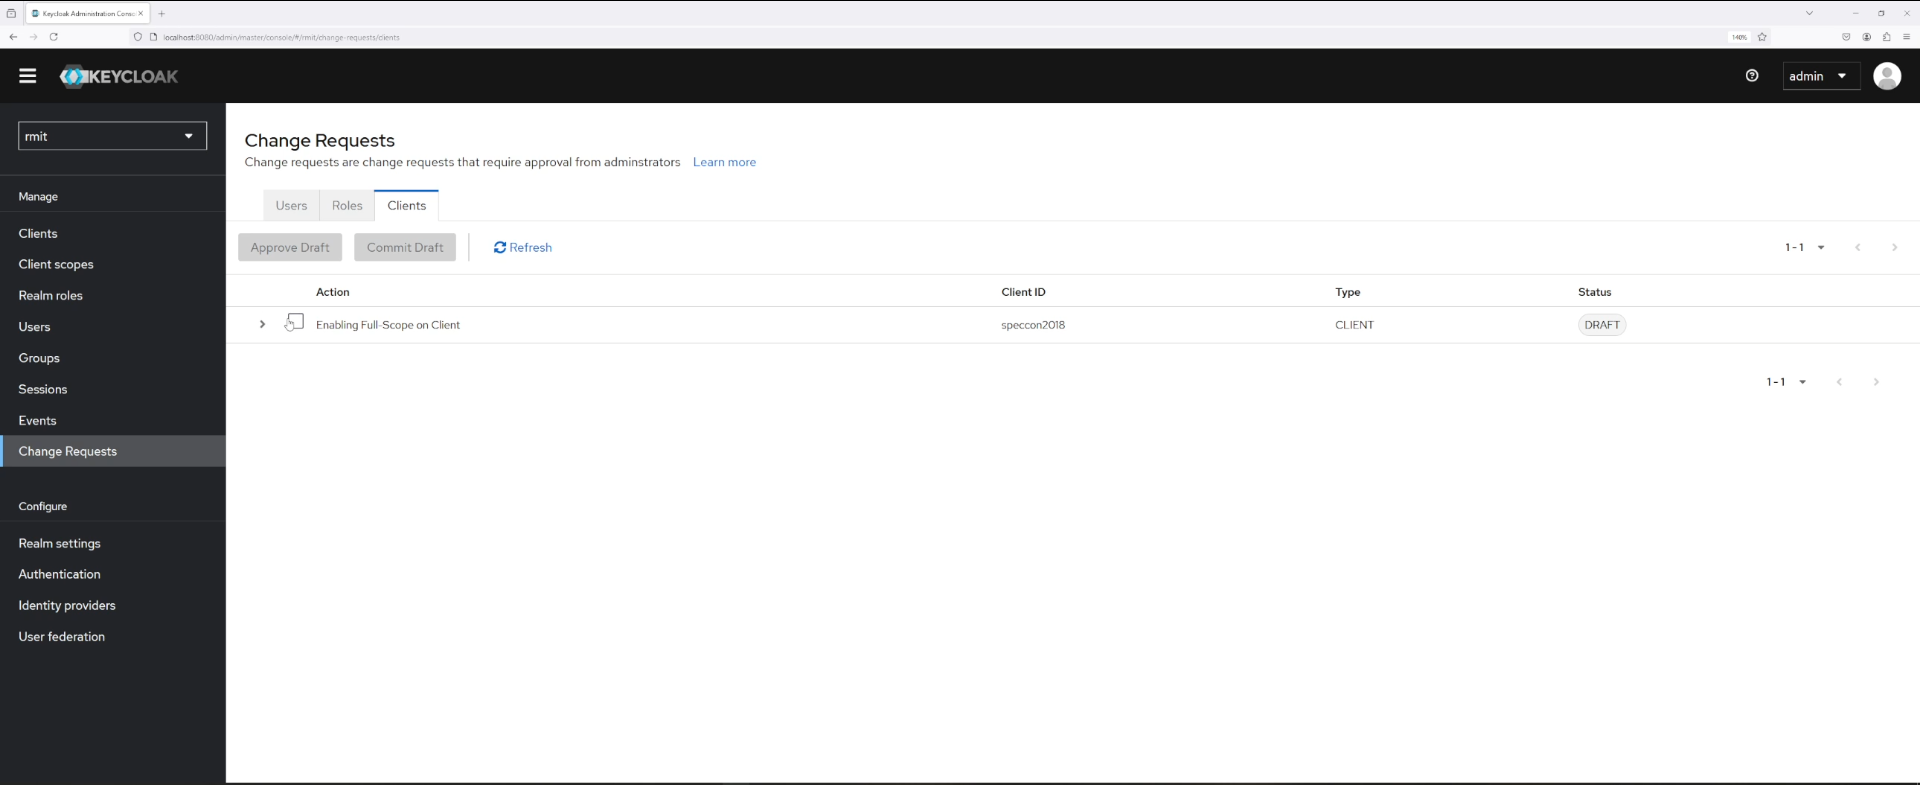
- Clients : In this tab, you'll find change requests that involve client settings, such as modifying client scopes (restricted or full). Changes affecting the scope of permissions granted to a client will appear here for approval before being applied.
2.2 Understanding the Table in the Change Request Tab
Each entry in the Change Request table provides specific details about the pending request, and the information displayed varies slightly depending on whether the change request involves Users , Roles , or Clients :
For Users :
- Action : Describes the operation, such as "Granting Role to User" or "Removing Role from User."
- Role : Displays the role being assigned or removed.
- Client ID : Shows the ID of the client affected by this request.
- Type : Indicates the type of action (e.g., USER).
- Status : Reflects the current status of the request (e.g., DRAFT, APPROVED).
For Roles :
- Action : Describes the operation, such as "Creating New Role" or "Modifying Role."
- Role : Displays the role being created, modified, or deleted.
- Composite Role : Indicates whether the role is a composite role.
- Client ID : Displays the client ID affected, if relevant.
- Type : Shows the type of action (e.g., ROLE).
- Status : Reflects the current status of the request (e.g., DRAFT, APPROVED).
For Clients :
- Action : Describes the operation, such as "Modifying Client Scope" or "Enabling Full Scope."
- Client ID : Displays the ID of the client being modified.
- Type : Indicates the type of action (e.g., CLIENT).
- Status : Shows the current status of the request (e.g., DRAFT, APPROVED).
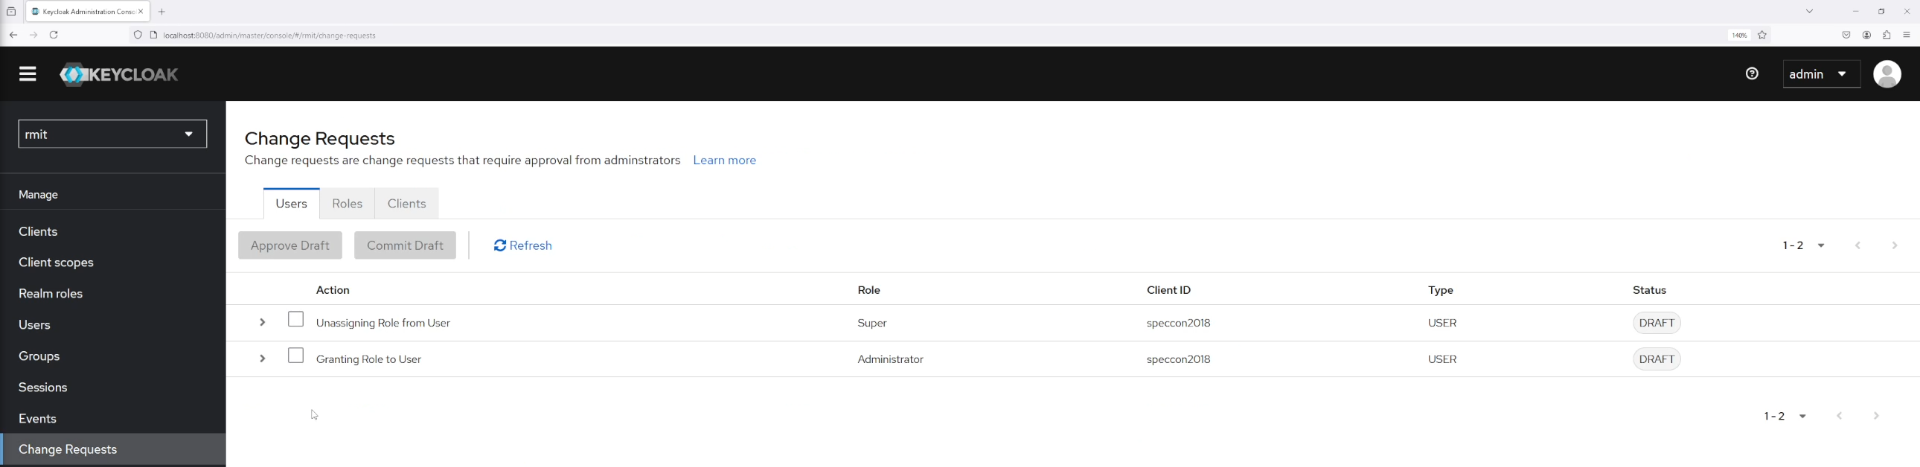
2.3 Approving Drafts
Once a change request is created (whether for Users , Roles , or Clients ), it enters a Draft status. At this stage, the changes are not yet applied, and the action (such as role assignment, role removal, or client modification) needs to be reviewed and approved by an administrator.
The approval and commit process is the same regardless of whether the change request is related to Users , Roles , or Clients . Administrators can easily manage pending changes across different entities using the same steps:
- Select the Draft : In the Change Request tab (under Users , Roles , or Clients ), find the request in Draft status.
- Approve the Draft : Click on the Approve Draft button to approve the request.
- Commit the Draft : Once approved, click Commit Draft to finalize the changes.
Once a draft is approved and committed, the change becomes active, and any modifications (such as role assignments, removals, or client scope changes) will be reflected in the system.
3. Managing Changes Related to a User
When changes are made to a user, such as assigning or removing roles, these changes are managed through a secure approval process. All changes to user roles are first saved as drafts and require administrator approval before they become active.
3.1 Navigating to the Users Tab
To manage changes related to a user, first navigate to the Users tab from the left-hand menu.
3.2 Assigning a Role to a User via Role Mapping
-
Select the User : In the Users tab, select the user for whom you want to assign a role.
-
Go to Role Mapping : Inside the user details, navigate to the Role Mapping tab to see the roles currently assigned to the user.
-
Assign a Role : Click on the Assign Role button to add a new role to the user. This will create a draft change request for role assignment.
-
Return to Change Request Tab to View Draft : Once the role is assigned, the request will be saved in Draft status. To review the draft, navigate back to the Change Request tab from the left-hand menu and find the request under the Users tab. You can view the details of the draft here.
-
Draft Status : Initially, the role is in draft status. This means the role is not yet reflected in the user's access token.
-
Approval Process : The draft must be reviewed and approved by authorized administrators. Once a quorum of administrators has approved the draft, you will then be able to commit the changes, finalizing the update. The change will only be applied after this final step is completed.

3.3 Removing a Role from a User via Role Mapping
-
Select the User : In the Users tab, select the user for whom you want to remove a role.
-
Go to Role Mapping : Inside the user details, navigate to the Role Mapping tab to see the roles currently assigned to the user.
-
Unassign a Role : Select the role you wish to remove and click the Unassign button. This will create a draft change request for role removal.
-
Return to Change Request Tab to View Draft : Once the role is marked for removal, the request will be saved in Draft status. To review the draft, navigate back to the Change Request tab from the left-hand menu and find the request under the Users tab. You can view the details of the draft here.
-
Draft Status : The removal is initially in draft status, meaning the role will still appear in the user's access token until the request is approved.
-
Approval Process : The draft must be reviewed and approved by authorized administrators. Once a quorum of administrators has approved the draft, you will then be able to commit the changes, finalizing the update. The change will only be applied after this final step is completed.

3.4 Managing Multiple Change Requests for a User
- Separate Requests : Assigning a new role and removing a role for the same user are treated as two separate change requests. Each request requires individual approval, allowing for detailed tracking of user access changes.
4. Managing Role Changes
In addition to managing user roles, the IGA system allows administrators to modify and manage roles directly. This includes creating, assigning, or modifying child roles , and adjusting parent roles . Any changes to roles that affect users will require approval, while other changes may be applied immediately.
4.1 Navigating to the Roles Tab
To manage roles for a specific client, follow these steps:
- Navigate to the Clients Tab : From the left-hand navigation menu, select Clients .
- Select a Client : Choose the client whose roles you want to manage.
- Go to the Roles Tab : Once inside the client’s settings, navigate to the Roles tab. This is where you can view, add, and modify roles associated with that client.
4.2 Creating or Modifying a Role
-
Create a New Role : To create a new role for the selected client, click the Create Role button, and fill in the required fields, such as role name and description. This will initiate a draft change request for role creation.
-
Modify an Existing Role : If you need to modify an existing role, select the role from the list. Changes to roles that impact users, such as adding permissions, will trigger a draft change request .
-
Add or Modify Child Roles : In the Role Mapping section, you can add or remove child roles under a parent role. These child roles can be assigned to users automatically when the parent role is assigned.
-
Return to Change Request Tab to View Draft : If the changes affect users, the request will be saved in Draft status. Navigate back to the Change Request tab to view and approve the draft. If the changes affect multiple users, the system will indicate which users will be impacted.
4.3 Role Changes That Do Not Require Approval
Changes to roles that do not affect any users will not require approval and will be approved immediately.
5. Managing Client Changes
The IGA system in TideCloak allows administrators to manage client settings, including modifying client scopes. These changes can impact the permissions granted to a client and affect all users connected to the realm. Any changes to client scopes that affect access permissions will require approval through the change request process.
5.1 Navigating to the Clients Tab
To manage client settings and scopes, follow these steps:
- Navigate to the Clients Tab : From the left-hand navigation menu, select Clients .
- Select a Client : Choose the client you wish to manage from the list of available clients in the realm.
5.2 Modifying Client Scope
-
Access Client Scope Settings : To modify a client’s scope, go to the Clients tab, select the desired client, and then navigate to the Client Scopes section.
-
Choose Scope : Once inside the Client Scopes tab, select the specific scope you want to modify.
-
Enable Full Scope : Inside the selected scope, you can toggle between full scope and restricted scope. Enabling full scope grants the client access to all roles in the realm, while restricting it limits the roles the client can access.
-
Return to Change Request Tab to View Draft : After modifying the client's scope, navigate back to the Change Request tab from the left-hand menu to view and approve the draft request.
6. Understanding Actions in Change Requests
Each action within the Change Request tab corresponds to a specific operation related to Users , Roles , or Clients . Below is a table that breaks down each action, its type (User, Role, or Client), and how it is triggered.
| Action Name | Action Type | How it is Triggered |
|---|---|---|
| Granting Role to User | User | Triggered when a role is assigned to a user via theRole Mapping section. |
| Unassigning Role from User | User | Triggered when a role is removed from a user via theRole Mapping section. |
| Granting Role to Composite Role | Role | Triggered when a role is added to a composite role in theRoles tab. |
| Enabling Full Scope | Client | Triggered when full scope is enabled for a client in theClient Scopes section. |
Managing Default Roles in Tide IGA
This section will explain how to manage default roles within the Tide Identity Governance Administration (IGA) system. Default roles are automatically created when TideCloak is installed and are composite roles that include a collection of other roles. These roles are automatically assigned to users, streamlining the role assignment process by grouping roles together. This reduces the need to manually assign individual roles each time a user is created or updated, ensuring consistent permissions across all users.
1. What Are Default Roles?
Default roles are composite roles that contain a set of child roles. These child roles are automatically assigned to any user that receives the default role. For instance, default-roles-myrealm is a composite role that includes other roles that should be assigned to users when they are created.
Note: The default role, such as default-roles-myrealm , is automatically created when you install TideCloak . This role is pre-configured to assign certain base roles to all users by default.
By using default roles, administrators can ensure consistency and reduce manual role assignments, as users automatically receive all roles bundled within the default composite role.
2. Accessing and Modifying Parent (Default) Roles
To modify parent roles in Tide IGA, follow these steps:
-
Navigate to Realm Roles : From the Tide admin console, go to the left-hand navigation menu and select Realm Roles .
-
Select Parent Role : You will see a parent role named default-roles-myrealm . This role serves as a parent role that holds other roles (child roles). Click on this role to view and manage it.
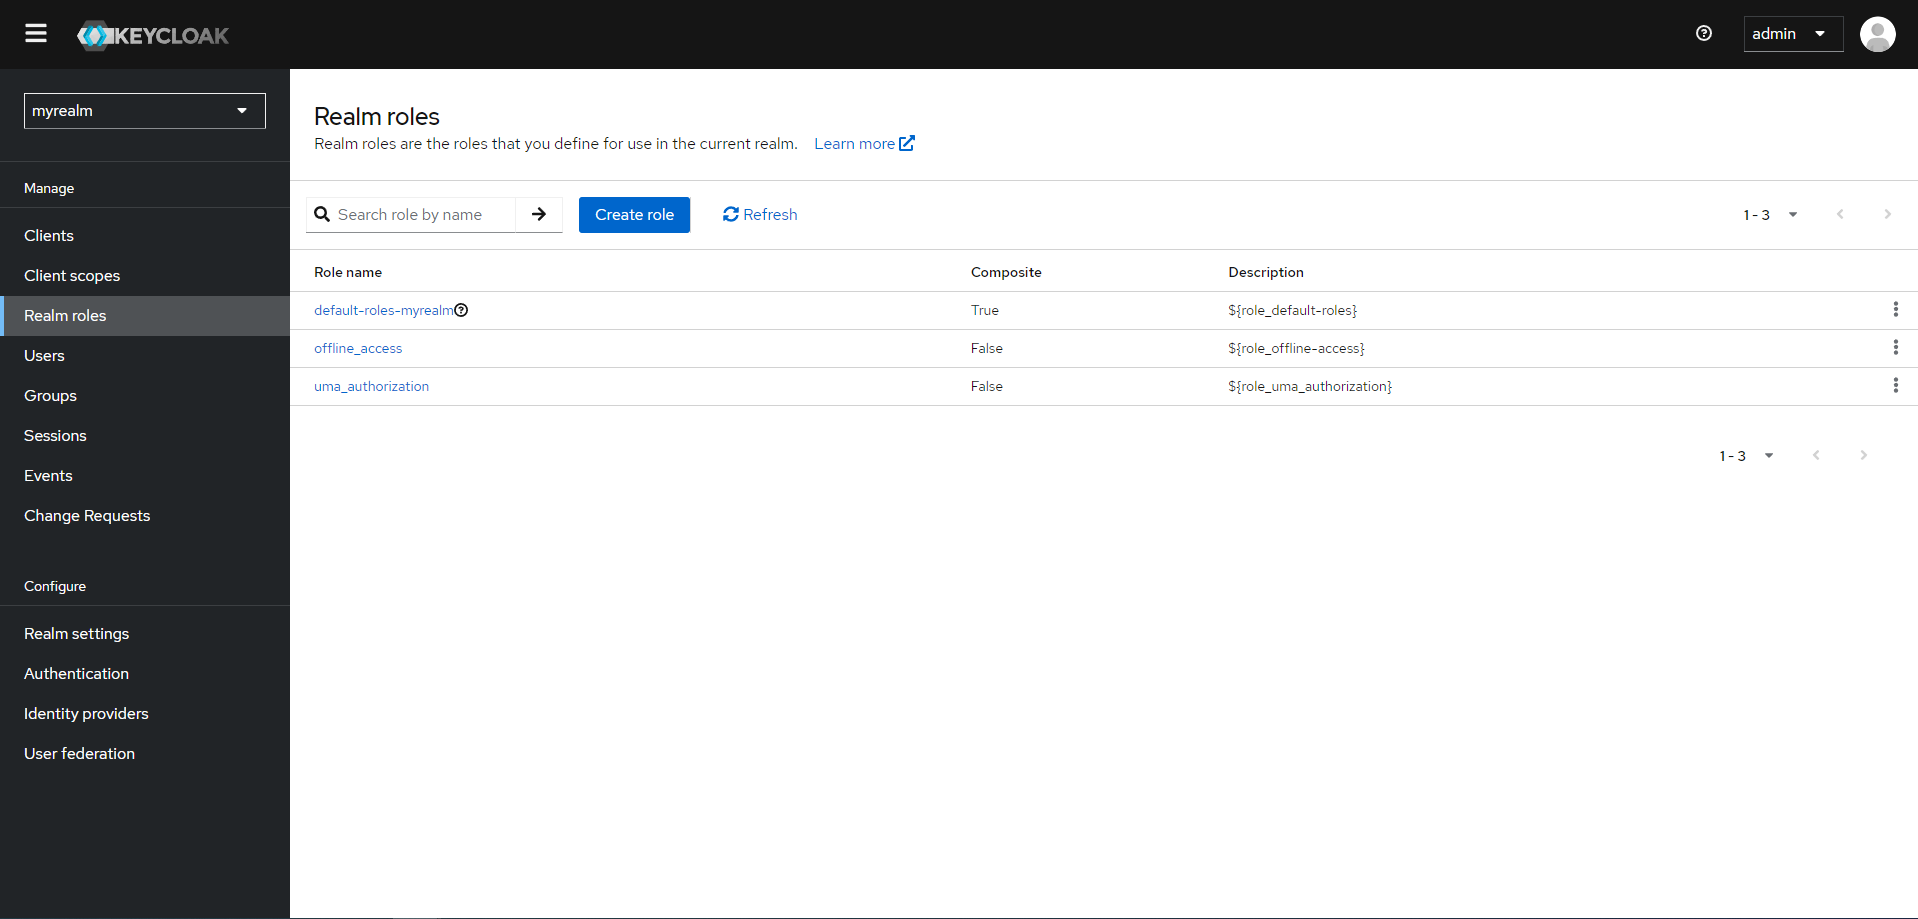
-
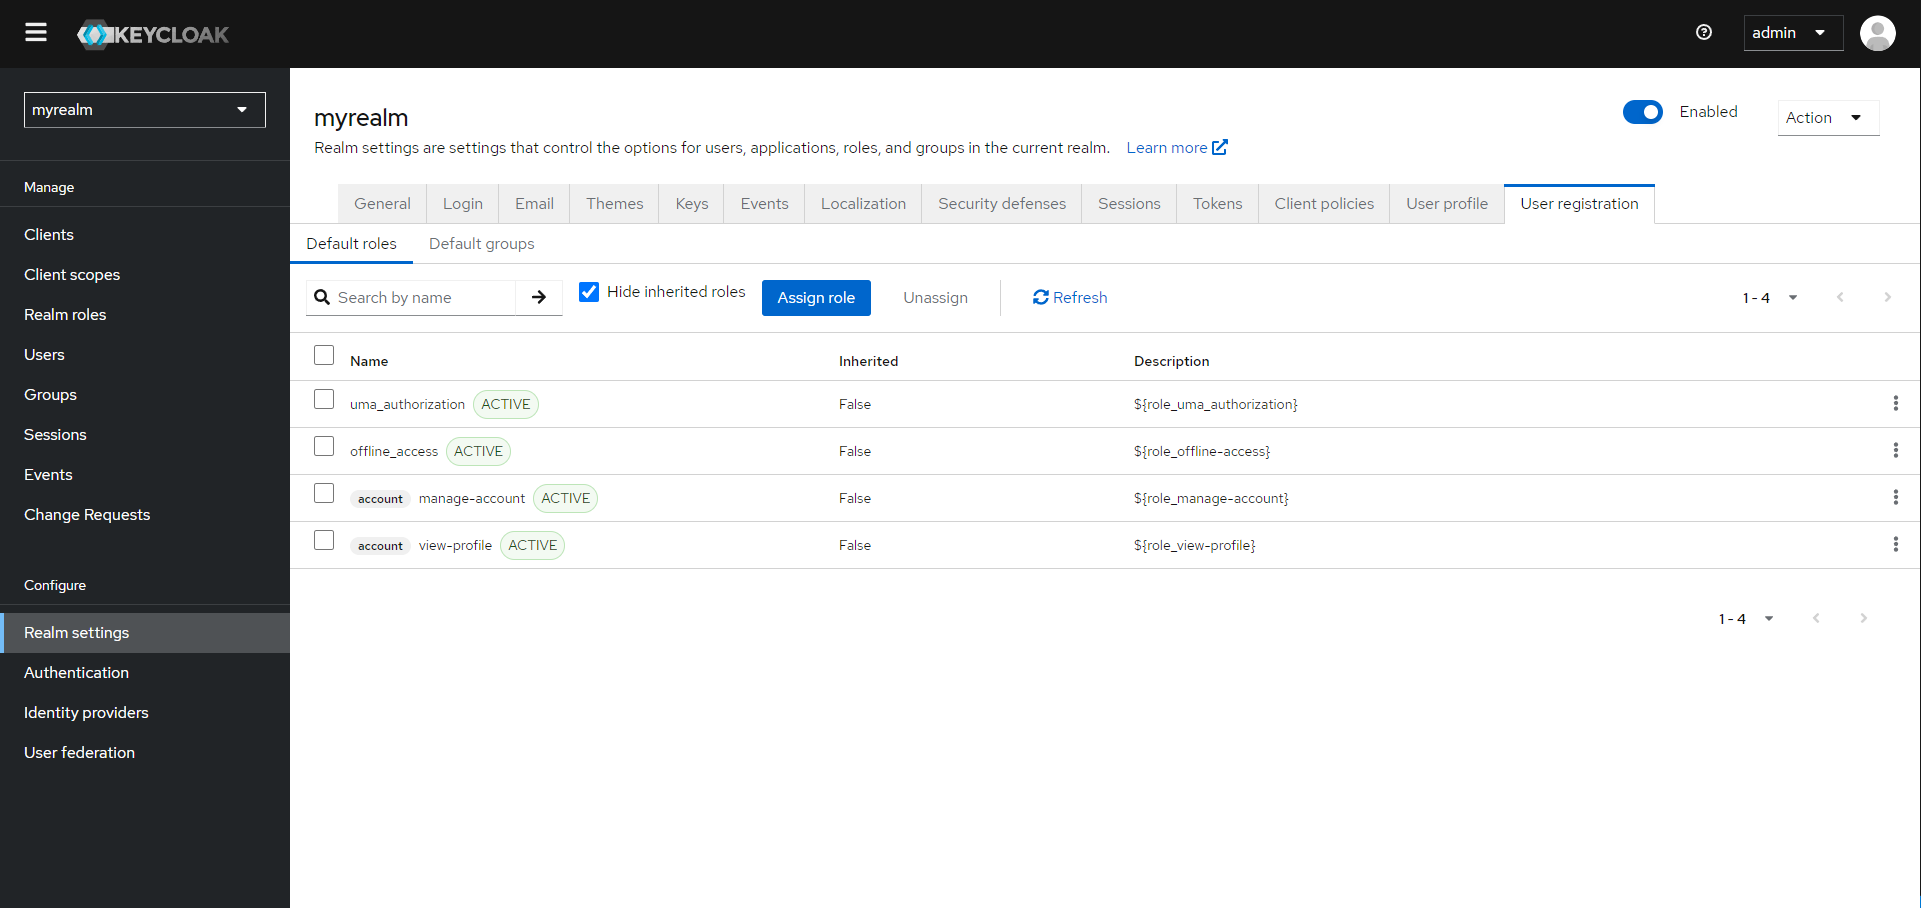
Modify Parent Role : On the default-roles-myrealm page, you can add or remove child roles to/from this composite role. Any role added here will automatically be assigned to users who are assigned this parent role.
3. Assigning Parent Roles to Users
When a user is created or assigned the parent role default-roles-myrealm , they automatically inherit all the child roles included in the parent role. This makes user management more efficient by pre-configuring role assignments.
Automatic Role Assignment Without Approval
When a parent role like default-roles-myrealm is assigned to a user, it does not require additional approval for the user. Users automatically receive all child roles contained in the parent role without needing administrator approval for each individual user.
However, any modifications to the child roles within the parent role will still need to go through the administrator approval process before being applied to all users. Once these modifications are approved and committed, they are automatically reflected for all users assigned the parent role.
4. Approval Process for Parent Roles
Changes to parent roles, such as default-roles-myrealm , follow the same approval process as regular roles. For details on how to manage and approve changes, please refer to the Approving Drafts section.
Once approved, changes to the parent role are applied automatically to all users assigned that role.